Shack
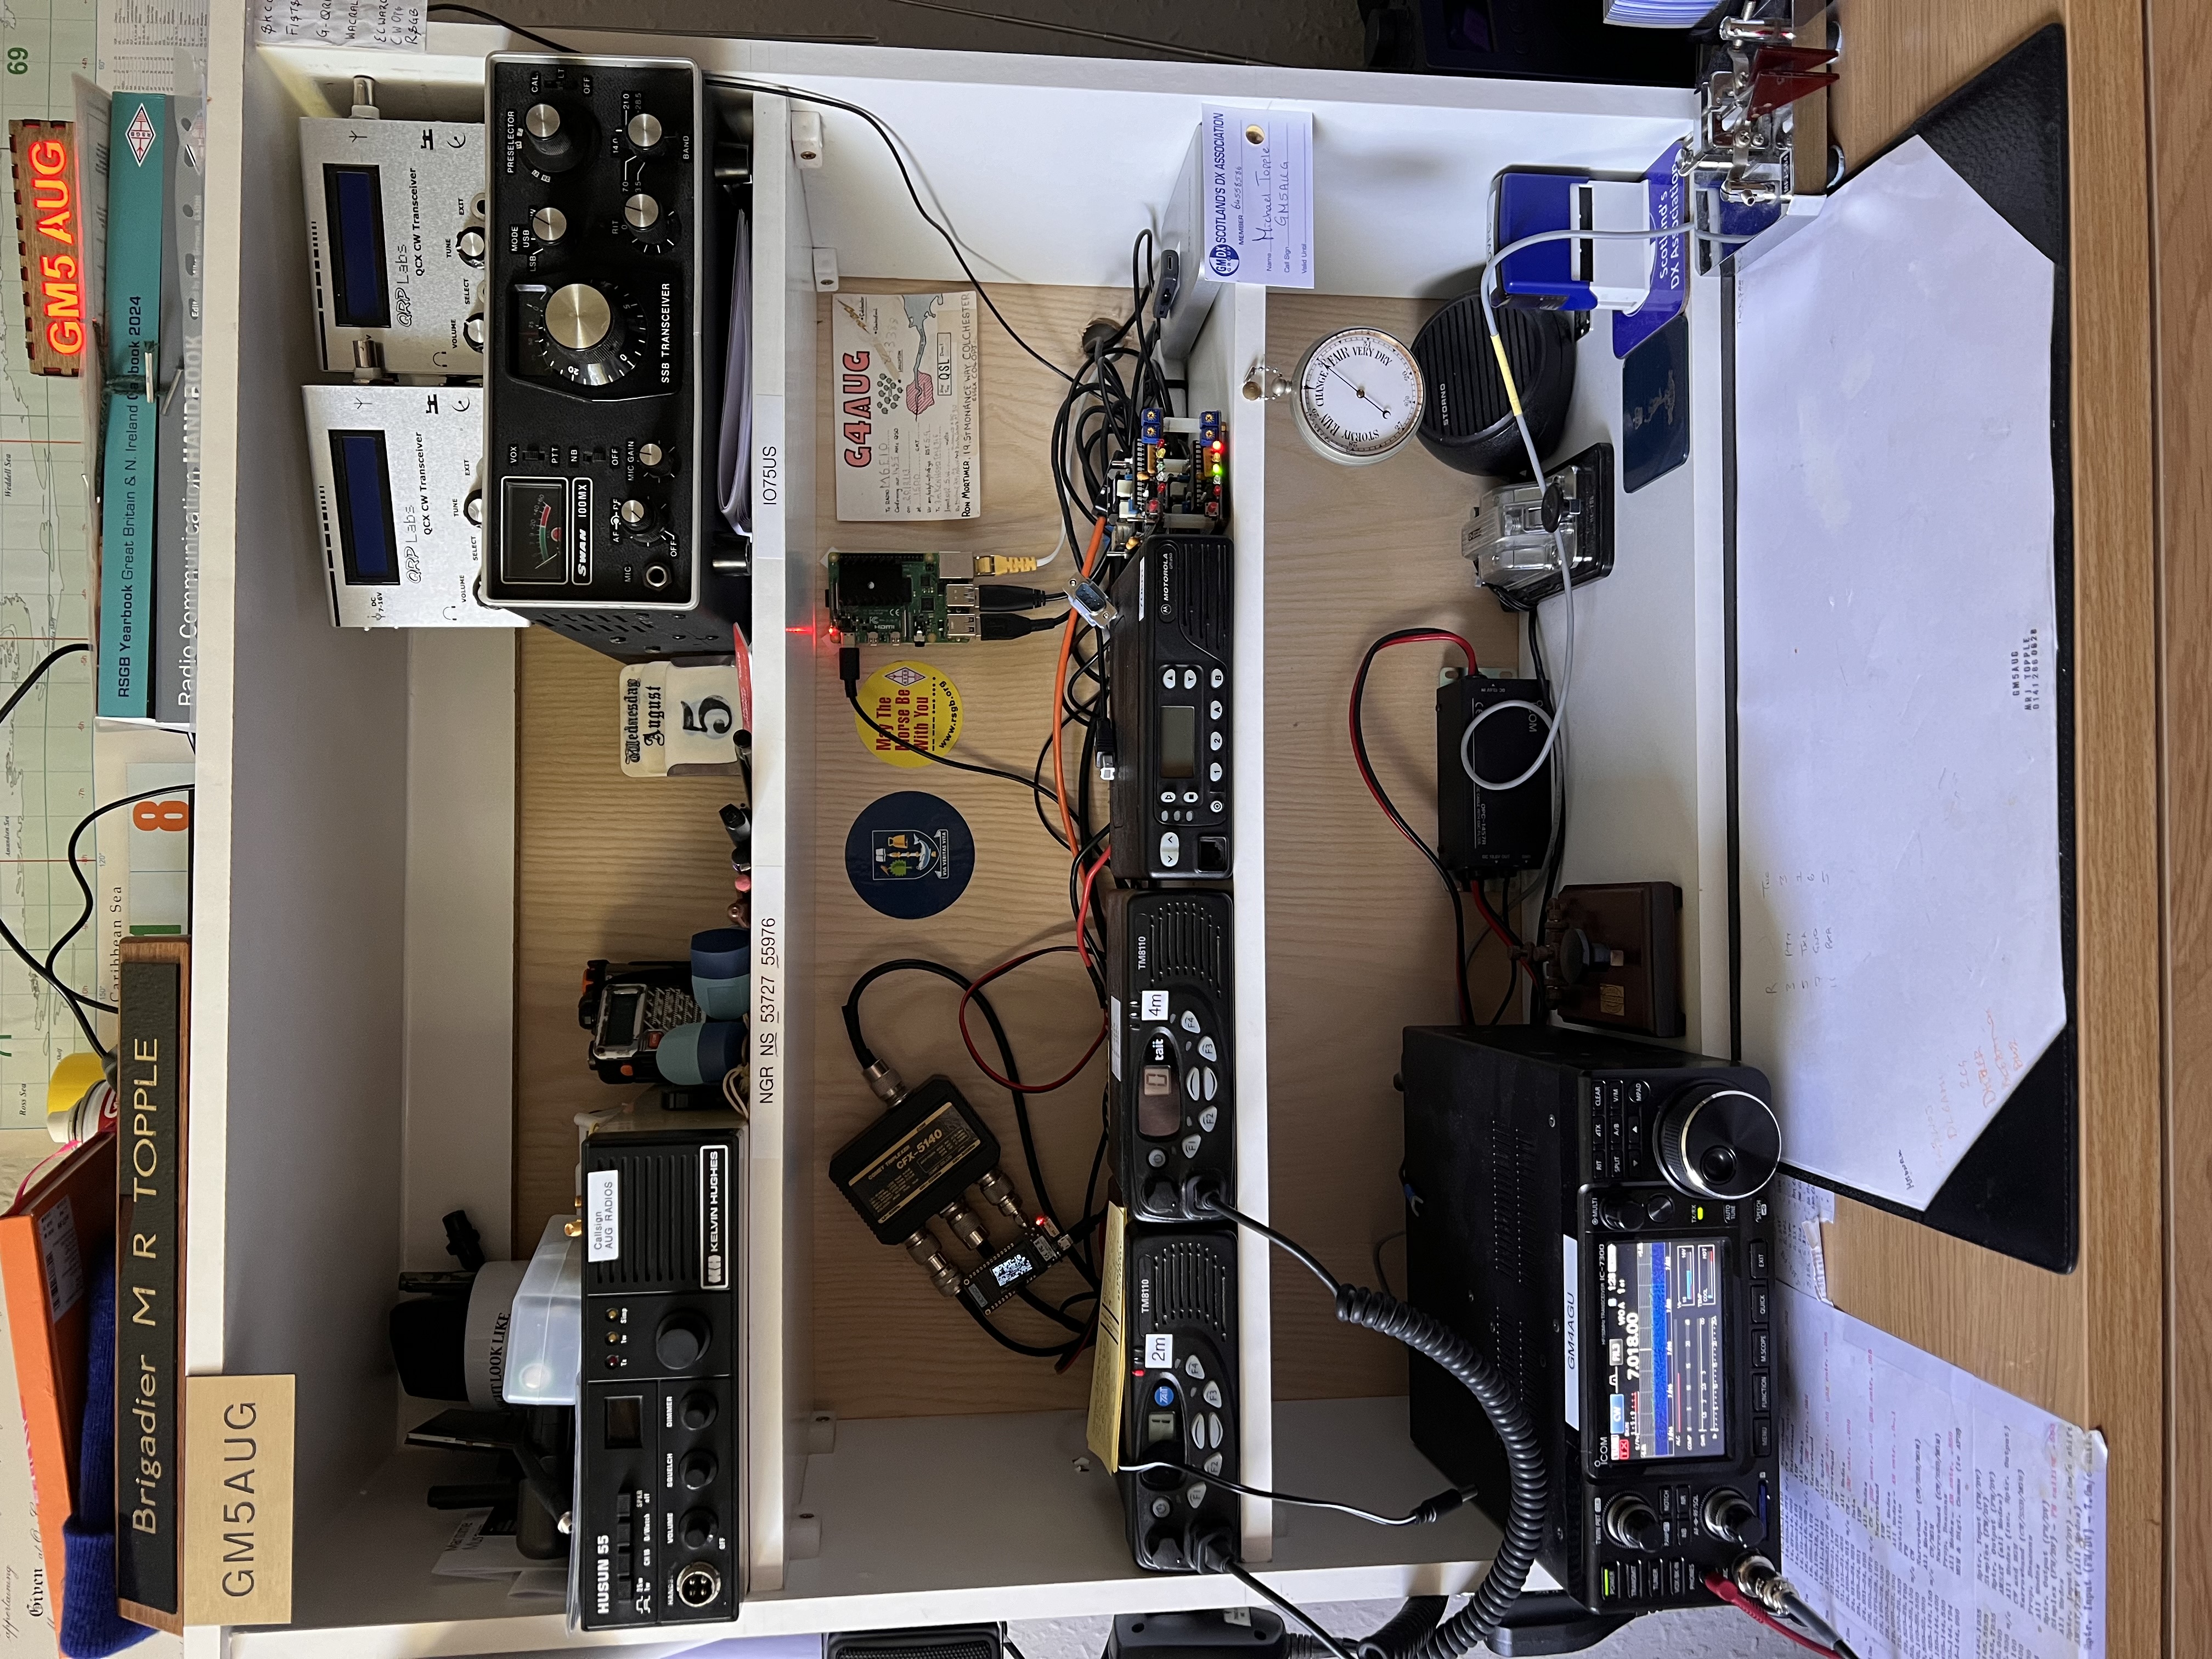 An earlier photo of the operating ‘bench’
Radios
The radios in my shack are as follow:
My main radio in the shack is an Icom IC-7100, this giving me 100w output across the HF bands, 50w on 2m and 35w on 70cms.My IC-7100 is currently in for repair, so I am using the GUWS’ Icom IC-7300 on HF and 6m.- My 2m radio is a Tait TM-8110
- My 4m radio is a Tait TM-8110
- My 70cm radio is a Motorola GM350
- My Marine AIS decoder (161 MHz - more info on the AIS page) is a SevenStar 2rxPro
Antennas
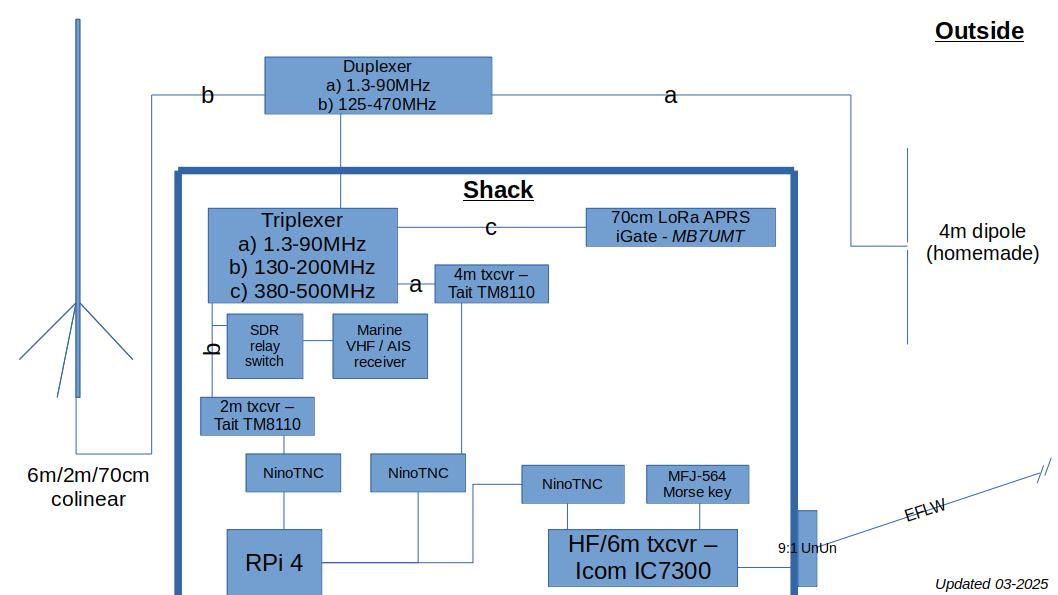
As shown below, I have three main shack antennas, covering all of HF, plus 4/2/70. In due course I hope to add 23cms to my list of available bands.
- HF/6m - End Fed Long Wire with 9:1 UnUn
- 6m/2m/70cm - Diamond V-2000
- 4m - Home-made dipole
Accessories
Also seen in the picture at the top is a Raspberry Pi. I use the Pi to take VFO information from the radio and upload it to CloudLog, allowing me to log all of my contacts. CloudLog then automatically synchronizes with eQSL, LOTW and QRZ.com. The Pi also hosts the packet node and controls the TNCs
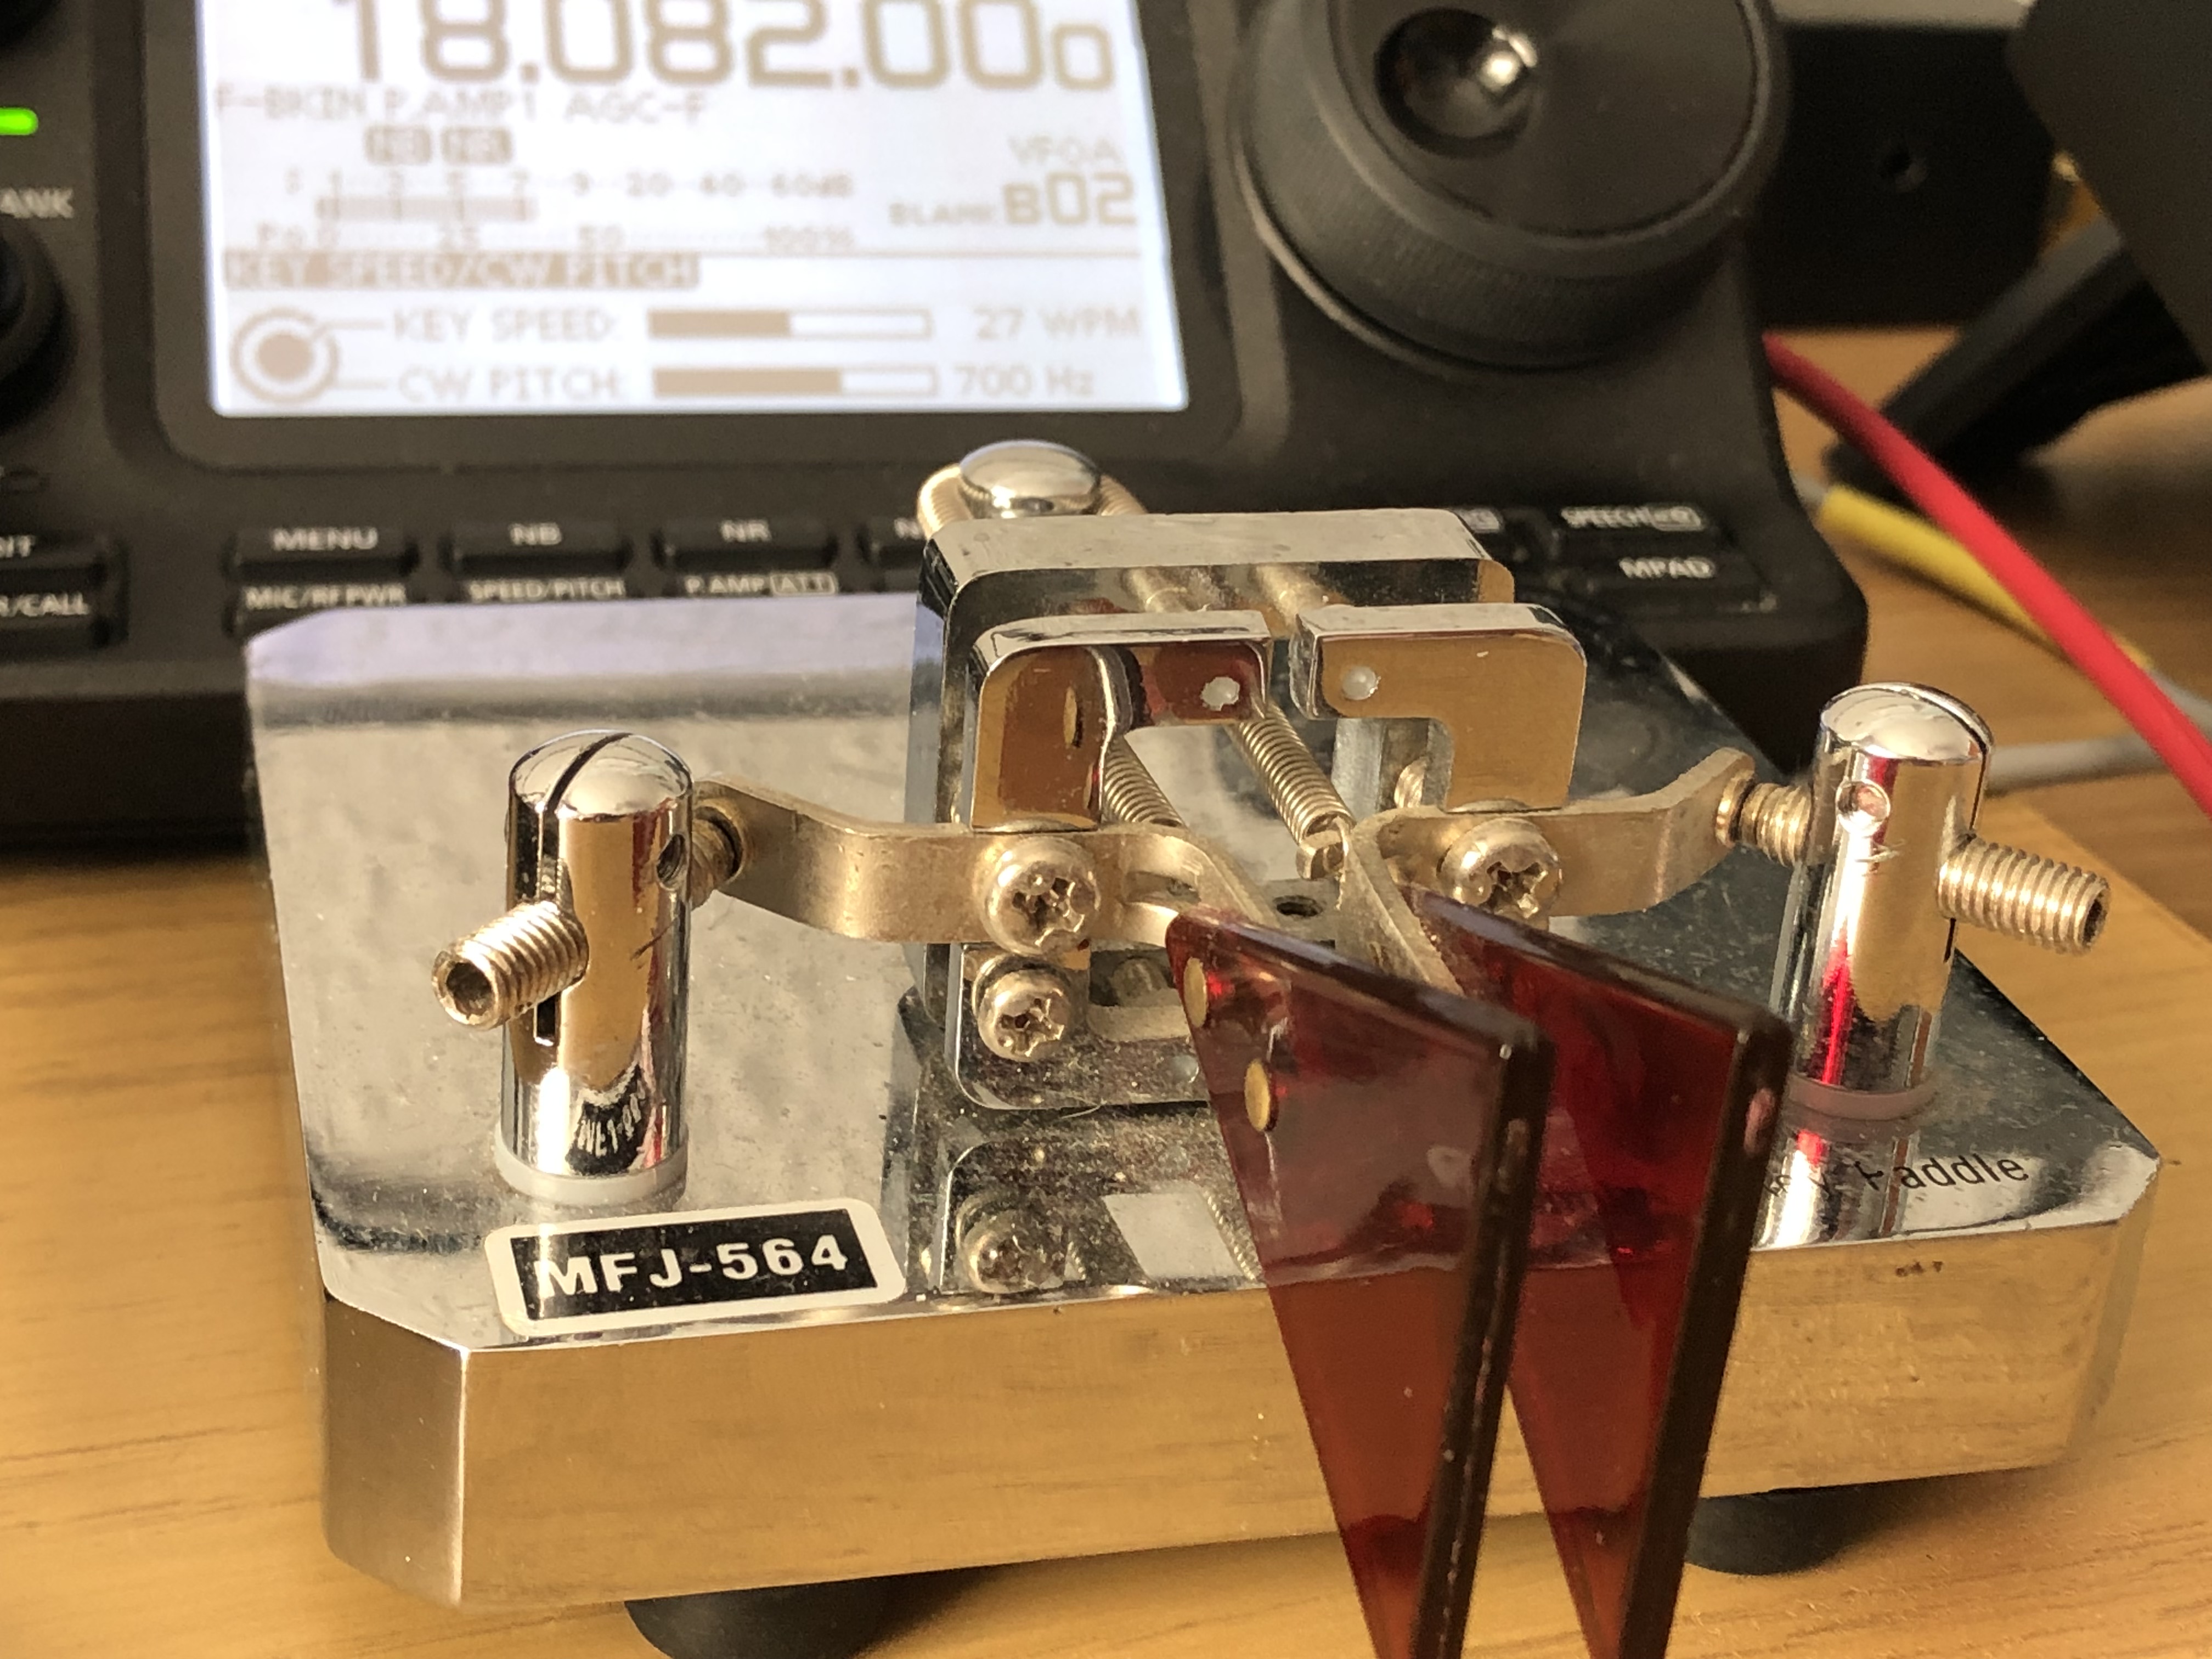 My Morse paddle key - a MFJ-564 - with my rig in the background
I’ve found that, as I’ve only got a limited station, CW offers my best chance of making interesting QSOs with assorted DX. While I’ve got nothing against those who like/love them, I’ve never got in to FT8, FT4, JS8Call and the like - but I still get a thrill of a CW contact!
My key, an MFJ-564 Iambic paddle, once belonged to S/K Gavin Nesbitt (MM1BXF) who died tragically young. While I didn’t know him intimately, he and I used to chat via text/phonecall quite frequently, and he was very encouraging towards me getting my Full licence.
 My straight Morse key
This is my straight key. Although I make most of my CW contacts using my MFJ paddle (above), I keep this key plugged into the back of the rig in case I want to make a straight key contact. Reasons for this include coming across a SKCC member and wanting to exchange SKCC details. Also there are some times where I just fancy a straight key contact!